
티스토리 뷰
utf-8는 영어 한글 일본어 중국어 등 전세계 대부분의 언어를 표현해주는 문자셋
취소선<strike></strike>
문자위의 주석 넣을때<ruby></ruby>
- <ruby>
- 한자<rt>표시할 한자의 음과 뜻</rt>
- </ruby>
- <!DOCTYPE html>
- <html>
- <head>
- <meta charset="utf-8" />
- <title>ruby 태그 사용하기</title>
- </head>
- <body>
- <ruby>
- 本<rt>ほん</rt>
- 田<rt>だ</rt>
- </ruby>
- </body>
- </html>

줄긋기<hr/>
<!DOCTYPE html>
<html>
<head>
<meta charset="utf-8" />
<title>줄긋기</title>
</head>
<body>
제목<hr/>
내용
</body>
</html>

특정영역 강조 <mark></mark>
<style>
mark{background:pink}
</style>
</head>
<body>
<p>mark태그는 문장에 <mark>특정영역을 강조할 때</mark>사용합니다.</p>
</body>

태그 시간을 표시할때 사용<time datetime="날짜시간"></time>
pubdate:발행 날ㅉ 표시
<time datetime="날찌 시간">표시할 내용</time>
<!DOCTYPE html>
<html>
<head>
<meta charset="utf-8" />
<title>time 태그</title>
</head>
<body>
이 포스트의 발행일 : <time datetime="2022-08-22T01:05:00" pubdate="pubdate">2022년 08월 22일</time>
</body>
</html>
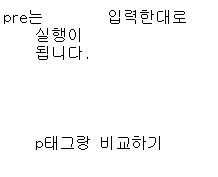
<p> vs <pre>
<!DOCTYPE html>
<html>
<head>
<meta charset="utf-8" />
<title>p 태그</title>
</head>
<body>
<pre>pre는 입력한대로
실행이
됩니다.
p태그랑 비교하기</pre>
</body>
</html>

target속성 사용
<a href="이동할 주소 입력" target="target속성의 값">링크이름<a>
<!DOCTYPE html>
<html>
<head>
<meta charset="utf-8" />
<title>target</title>
</head>
<body>
<a href="https://www.naver.com/" target="_blank">_blank (새창에서 열기)</a>
<a href="https://www.google.com/" target="_self">_self(현재창에서 열기)</a>
<a href="https://www.myoutube.com/" target="_parent">_parent (부모창에서 열기)</a>
<a href="https://syscoding.tistory.com/" target="_top">_top (가장 처음창에서 열기)</a>
</body>
</html>
_parent:웹브라우저 창이 여러개 떠 있을 때 현재 페이지를 연 부모 창에서 클릭
_top:현재 열려있는 웹브라우저 창 중 가장 처음뜬 창에서 클릭한 링크 열림
페이지내에서 이동하는 방법 name속성
<a href="#이름">출발<a>
<a name="이름">도칙<a>
<!DOCTYPE html>
<html>
<head>
<meta charset="utf-8" />
<title>name</title>
</head>
<body>
<a href="#here">출발<a>
<br><br><br><br><br><br><br><br><br><br><br><br>
<br><br><br><br><br><br><br><br><br><br><br><br>
<br><br><br><br><br><br><br><br><br><br><br><br>
<br><br><br><br><br><br><br><br><br><br><br><br>
<br><br><br><br><br><br><br><br><br><br><br><br>
<br><br><br><br><br><br><br><br><br><br><br><br>
<br><br><br><br><br><br><br><br><br><br><br><br>
<br><br><br><br><br><br><br><br><br><br><br><br>
<a name="here">도착<a>
<br><br><br><br><br><br><br><br><br><br><br><br>
<br><br><br><br><br><br><br><br><br><br><br><br>
<br><br><br><br><br><br><br><br><br><br><br><br>
<br><br><br><br><br><br><br><br><br><br><br><br>
<br><br><br><br><br><br><br><br><br><br><br><br>
<br><br><br><br><br><br><br><br><br><br><br><br>
<br><br><br><br><br><br><br><br><br><br><br><br>
<br><br><br><br><br><br><br><br><br><br><br><br>
</body>
</html>
링크에 마우스에 대고 있으면 설명 보여주기 title속성
- <body>
- <a title="네이버" href="www.naver.com">naver</a>
- </body>
데이터 전달 ping속성
<a ping="데이터를 전송할 주소와 데이터" title="링크 설명" href="주소">링크표시명<a>
- <table bgcolor="blue" width="500">
- <tr align="center">
- <td style="color:red">일</td>
- <td>월</td>
- <td>화</td>
- <td>수</td>
- <td>목</td>
- <td>금</td>
- <td style="color:red">토</td>
- </tr>
- <tr align="center">
- <td bgcolor="pink" colspan="3"></td>
- <td>1</td>
- <td>2</td>
- <td>3</td>
- <td style="color:red">4</td>
- </tr>
- <tr align="center">
- <td style="color:red">5</td>
- <td>6</td>
- <td>7</td>
- <td>8</td>
- <td>9</td>
- <td>10</td>
- <td style="color:red">11</td>
- </tr>
- <tr align="center">
- <td style="color:red">12</td>
- <td>13</td>
- <td>14</td>
- <td>15</td>
- <td>16</td>
- <td>17</td>
- <td style="color:red">18</td>
- </tr>
- <tr align="center">
- <td style="color:red">19</td>
- <td>20</td>
- <td>21</td>
- <td>22</td>
- <td>23</td>
- <td>24</td>
- <td style="color:red">25</td>
- </tr>
- <tr align="center">
- <td style="color:red">26</td>
- <td>27</td>
- <td>28</td>
- <td>29</td>
- <td>30</td>
- <td>31</td>
- <td bgcolor="pink"></td>
- </tr>
- </table>
또 다른 창 아이프레임
<iframe src="링크할 주소"></iframe>
scrolling="yes.no.auto" //auto 필요할시 생성 필요없을시 생성X
<!DOCTYPE html>
<html>
<head>
<meta charset="utf-8" />
<title>iframe태그 학습</title>
</head>
<body>
<iframe src="https://www.naver.com/" style="width:90%" height="600" scrolling="auto">
</iframe>
</body>
</html>
form 태그 input
- <input type='type 속성의 값' name='값' value='값' />
name 속성 서버에서 입력값을 구별하기 위해 사용하는 값,용도에 맞는 이름을 설정(php에서 값을 받음)
value 속성 실제 서버에 전송할 데이터를 의미
input태그 email:폼의 데이터를 전송시에 email의 유효성을 검사하는 기능을 갖는다.
input태그 search:검색어를 삭제하는 버튼이 생성
<!DOCTYPE html>
<html>
<head>
<meta charset="utf-8" />
<title>input 태그의 type속성 값 search</title>
</head>
<body>
<form name="해당 폼의 이름" action="값을 보낼 주소" method="post">
<input type='text' name='text' />
<br>
<input type='search' name='searchKeyword' />
</form>
</body>
</html>

input 태그 url:입력한 url의 유효성 검사를 할수 있다.
+required:필수 입력항목
- <form name="해당 폼의 이름" action="값을 보낼 주소" method="post">
- <input type='url' name='userUrl' required/>
- <br>
- <input type='submit' name='전송' />
- </form>
input 태그 step속성(숫자 간격 설정)
- <input type='number' name='서버에서 인식할 값' step='3' />
input 태그 tel :국가마다 전화번호 입력 방식의 차이로 숫자 유효성 검사하지 않음
- <!DOCTYPE html>
- <html>
- <head>
- <meta charset="utf-8" />
- <title>input 태그의 type속성 값 tel</title>
- </head>
- <body>
- <form name="해당 폼의 이름" action="값을 보낼 주소" method="post">
- <input type='tel' name='phone1' />-
- <input type='tel' name='phone2' />-
- <input type='tel' name='phone3' />
- </form>
- </body>
- </html>
라디오버튼:한개의 값만 선택
- <input type='radio' name='서버에서 인식할 값' value='서버에 전송할 값'/>
name속성의 값이 동일해야 한개의 그룹이 된다.
input태그 date :날짜 입력창
- <!DOCTYPE html>
- <html>
- <head>
- <meta charset="utf-8" />
- <title>input 태그의 type속성 값 date</title>
- </head>
- <body>
- <h1>오늘날짜는?</h1>
- <form name="해당 폼의 이름" action="값을 보낼 주소" method="post">
- <input type='date' name='userBirthday' value='2022-08-22'/>
- </form>
- </body>
- </html>

input 태그 month
- <input type='month' name='서버에서 인식할 값' value='서버에 전송할 값'/>
<!DOCTYPE html>
<html>
<head>
<meta charset="utf-8" />
<title>input 태그의 type속성 값 month</title>
</head>
<body>
<h1>오늘 몇월?</h1>
<form name="해당 폼의 이름" action="값을 보낼 주소" method="post">
<input type='month' name='userBirthday' value='2022-08'/>
</form>
</body>
</html>

input 태그 week
- <input type='week' name='서버에서 인식할 값' value='서버에 전송할 값'/>
<!DOCTYPE html>
<html>
<head>
<meta charset="utf-8" />
<title>input 태그의 type속성 값 week</title>
</head>
<body>
<h1>오늘 몇주차 ?</h1>
<form name="해당 폼의 이름" action="값을 보낼 주소" method="post">
<input type='week' name='userBirthday' value='2022-W04'/>
</form>
</body>
</html>

input time 태그
- <input type='time' name='서버에서 인식할 값' value='서버에 전송할 값'/>
24시 제로 표시
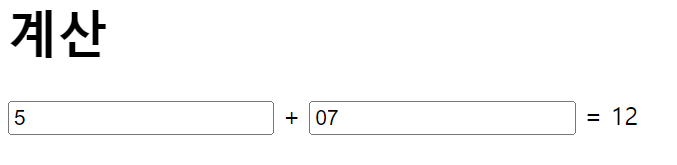
input output 태그
- <output name='서버에서 인식할 값' for='계산과 관련한 태그의 id속성의 값'></output>
for속성에는 id속성의 값,한번만 사용
- <!DOCTYPE html>
- <html>
- <head>
- <meta charset="utf-8" />
- <title>output 태그</title>
- </head>
- <body>
- <h1>계산</h1>
- <form name="해당 폼의 이름" action="값을 보낼 주소" method="post" oninput="result.value=parseInt(num1.value)+parseInt(num2.value)">
- <input type='number' id='num1' name='num1' value='0'/> +
- <input type='number' id='num2' name='num2' value='0'/> =
- <output for='num1, num2' name='result'></output>
- </form>
- </body>
- </html>
input태그 file적용
- <form name="이 폼의 이름" action="이 데이터들을 받을 파일" method="전송방식">
- </form>
enctype="multipart/form-data"
enctype는 해당 폼태그의 데이터를 인코딩하는 방식을 지정하는 속성
"multipart/form-data"는 전체 데이터를 인코딩 하지 않음을 의미
인코딩이란 ? 압축과정
- <!DOCTYPE html>
- <html>
- <head>
- <meta charset="utf-8" />
- <title>input 태그의 type속성 값 reset</title>
- </head>
- <body>
- <form name="이 폼의 이름" action="이 데이터들을 받을 파일" method="post" enctype="multipart/form-data">
- <input type='file' name='' />
- </form>
- </body>
- </html>
1개의 파일만 선택
input태그 file 여러개의 파일 선택
- <!DOCTYPE html>
- <html>
- <head>
- <meta charset="utf-8" />
- <title>input 태그의 type속성 값 reset</title>
- </head>
- <body>
- <form name="이 폼의 이름" action="이 데이터들을 받을 파일" method="post" enctype="multipart/form-data">
- <input type='file' name='' multiple/>
- </form>
- </body>
- </html>
모바일의 경우
- <!DOCTYPE html>
- <html>
- <head>
- <meta charset="utf-8" />
- <title>input 태그의 type속성 값 reset</title>
- </head>
- <body>
- <form name="이 폼의 이름" action="이 데이터들을 받을 파일" method="post" enctype="multipart/form-data">
- <input type='file' name='' multiple/>
- <input type='file' name='' multiple/>
- <input type='file' name='' multiple/>
- <input type='file' name='' multiple/>
- <input type='file' name='' multiple/>
- </form>
- </body>
- </html>
form 태그 데이터 전송:서버에 데이터를 전송하는 버튼 생성 submit버튼을 누르면 해당 폼 태그의 action속성에 있는 파일로 데이터를 전송함
- <!DOCTYPE html>
- <html>
- <head>
- <meta charset="utf-8" />
- <title>input 태그의 type속성 값 submit</title>
- </head>
- <body>
- <form name="test" action="result.php" method="post">
- 아이디 : <input type='text' name='id' />
- 별명 : <input type='text' name='nickName' />
- <input type='submit' value='전송' />
- </form>
- </body>
- </html>
input태그 reset: 데이터 리셋하기
- <input type='reset' value='버튼에 표시할 텍스트'/>
- <!DOCTYPE html>
- <html>
- <head>
- <meta charset="utf-8" />
- <title>input 태그의 type속성 값 reset</title>
- </head>
- <body>
- <form name="test" action="test.php" method="post">
- 아이디 : <input type='text' name='id' />
- 별명 : <input type='text' name='nickName' />
- <input type='reset' value='모두 지우기' />
- </form>
- </body>
- </html>

input 태그 placeholder 속성: 입력박스에 어떠한 값을 입력해야 하는지 알려 줄때 사용
- <input type='text' name='서버에서 인식할 값' placeholder='표시할 값'/>
input 태그 autofocus 속성: 입력창에 자동으로 포커스 적용
- <input type='text' name='서버에서 인식할 값' autofocus/>
input 태그 autocomplete 속성:자동 완성 기능
- <input type='text' name='서버에서 인식할 값' autocomplete="off 또는 on"/>
input 태그 required : 필수입력사항
- <input type='text' name='서버에서 인식할 값' required />
input 태그 readonly : 읽기 전용
- <input type='text' name='서버에서 인식할 값' readonly />
+textarea태그
- <form name="해당 폼의 이름" action="값을 보낼 주소" method="post">
- <h1>당신이 가장 좋아하는 강아지는 ?</h1>
- <textarea name='favoritedog' readonly>말티즈</textarea>
- </form>
label태그
- <label for='연결할 태그의 id속성의 값' >표시할 명칭</label>
- <input type='text' id='id' />
selcet태그
- <select name="서버에서 인식할 값">
- <option value="실제 서버에 전송할 값">화면 표시 값 </option>
- <option value="실제 서버에 전송할 값">화면 표시 값 </option>
- <option value="실제 서버에 전송할 값">화면 표시 값 </option>
- </select>
progress 태그(동적):진행도
- <!DOCTYPE html>
- <html>
- <head>
- <meta charset="utf-8" />
- <title>progress 태그</title>
- </head>
- <body>
- <progress value='40' max='100'></progress><b> 40%</b>
- </body>
- </html>

javascript추가시켜 동작하게 함
meter태그(정적):현재의 점수나 수치표시
속성
- min : 최소값 설정
- max : 최대값 설정
- low : 낮은값 설정
- optimum : 적당값 설정
- high : 높은값 설정
- <meter value='40' max='100'></meter>
<!DOCTYPE html>
<html>
<head>
<meta charset="utf-8" />
<title>meter 태그</title>
</head>
<body>
<h3>낮은 값 (low와 high의 범위 안)</h3>
<meter min='0' max='100' low='30' optimum='50' value='30' high='80'></meter>
<h3>높은 값 (low와 high의 범위 안)</h3>
<meter min='0' max='100' low='30' optimum='50' value='70' high='80'></meter>
<h3>적당 값</h3>
<meter min='0' max='100' low='30' optimum='50' value='50' high='80'></meter>
<h3>낮은 값 (low와 high의 범위 밖)</h3>
<meter min='0' max='100' low='30' optimum='50' value='10' high='80'></meter>
<h3>높은 값 (low와 high의 범위 안)</h3>
<meter min='0' max='100' low='30' optimum='50' value='90' high='80'></meter>
</body>
</html>
low속성과 high속성 범위 안의 값은 녹색, 범위 밖의 값은 노란색으로 표시

max값 설정하지 않은 상태에서 소수점을 사용하여 값을 사용하면 max속성의 값은 1이 된다.
라디오버튼:여러가지 항목중에 하나만 선택하는 기능
<!DOCTYPE html>
<html>
<head>
<meta charset="utf-8" />
<title>form태그 학습</title>
</head>
<body>
키우는 강아지를 선택하시오<br />
<form name="해당 폼의 이름" action="값을 보낼 주소" method="post 방식인지 get 방식인지">
말티즈<input type="radio" name="dog" value="말티즈" />
리트리버<input type="radio" name="dog" value="리트리버" />
푸들<input type="radio" name="dog" value="푸들" />
</form>
</body>
</html>
name이 dog로 통일 다른 버튼을 누르시 이미 선택된 버튼은 해제된다.


다른 버튼 눌러도 그 전 버튼은 해제가 안된다.
회원가입폼
- <!DOCTYPE html>
- <html>
- <head>
- <meta charset="utf-8" />
- <title>form태그 학습</title>
- </head>
- <body>
- <form name="해당 폼의 이름" action="값을 보낼 주소" method="post 방식인지 get 방식인지">
- <table>
- <tr>
- <td>이름</td>
- <td><input type="text" name="user_name" /></td>
- </tr>
- <tr>
- <td>아이디</td>
- <td><input type="text" name="user_id" /></td>
- </tr>
- <tr>
- <td>비밀번호</td>
- <td><input type="password" name="user_pw" /></td>
- </tr>
- <tr>
- <td>비밀번호 확인</td>
- <td><input type="text" name="user_pw2" /></td>
- </tr>
- <tr>
- <td>주소</td>
- <td><input type="text" name="user_address" /></td>
- </tr>
- <tr>
- <td>생년월일</td>
- <td><select name="user_birth_year">
- <option value="2000" selected>2000</option>
- <option value="2001" selected>2001</option>
- <option value="2002" selected>2002</option>
- <option value="2003" selected>2003</option>
- <option value="2004" selected>2004</option>
- </select>
- 년
- <select name="user_birth_month">
- <option value="1">1</option>
- <option value="2">2</option>
- <option value="3">3</option>
- <option value="4">4</option>
- <option value="5">5</option>
- <option value="6">6</option>
- <option value="7">7</option>
- <option value="8">8</option>
- <option value="9">9</option>
- <option value="10">10</option>
- <option value="11">11</option>
- <option value="12">12</option>
- </select>
- 월
- <select name="user_birth_day">
- <option value="1">1</option>
- <option value="2">2</option>
- <option value="3">3</option>
- <option value="4">4</option>
- <option value="5">5</option>
- <option value="6">6</option>
- <option value="7">7</option>
- <option value="8">8</option>
- <option value="9">9</option>
- <option value="10">10</option>
- <option value="11">11</option>
- <option value="12">12</option>
- <option value="13">13</option>
- <option value="14">14</option>
- <option value="15">15</option>
- <option value="16">16</option>
- <option value="17">17</option>
- <option value="18">18</option>
- <option value="19">19</option>
- <option value="20">20</option>
- <option value="21">21</option>
- <option value="22">22</option>
- <option value="23">23</option>
- <option value="24">24</option>
- <option value="25">25</option>
- <option value="26">26</option>
- <option value="27">27</option>
- <option value="28">28</option>
- <option value="29">29</option>
- <option value="30">30</option>
- <option value="31">31</option>
- </select>
- 일
- </td>
- </tr>
- <tr>
- <td>직업</td>
- <td><select name="user_job">
- <option value="student">학생</option>
- <option value="teacher">교사</option>
- <option value="developer">개발자</option>
- <option value="publisher">퍼블리셔</option>
- <option value="driver">운전사</option>
- <option value="architecture">건축가</option>
- <option value="actor">배우</option>
- </select>
- </td>
- </tr>
- <tr>
- <td></td>
- <td><input type="submit" name="submit" value="완료" />
- <input type="reset" name="reset" value="리셋" /></td>
- </tr>
- </table>
- </form>
- </body>
- </html>
복습!
main태그
페이지에서 단 1회사용
페이지를 감싸는 용도로 사용
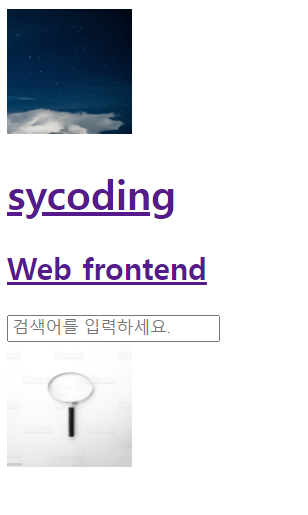
header 태그
<!DOCTYPE html>
<html>
<head>
<meta charset="utf-8" />
<title>header 태그</title>
</head>
<body>
<header>
<div id="serviceNameArea">
<div>
<img src="star.jpg" width="100px" height="100px" alt="star">
</div>
<a href="https://syscoding.tistory.com/">
<h1 id="serviceNmae">sycoding</h1>
<h2>Web frontend</h2>
</a>
</div>
<div id="searchArea">
<div id="searchclick">
<input type="text" id="searchKeyword" placeholder="검색어를 입력하세요.">
</div>
<div id="search.img">
<img src=search.jpg width="100px" height="100px" id="searchBtn">
</div>
</div>
</header>
</body>
</html>
address태그 :주소를 입력할 때 사용
기본적으로 이태릭 효과가 적용
<!DOCTYPE html>
<html>
<head>
<meta charset="utf-8" />
<title>address 태그</title>
<style>
address{font-style:unset} //이태릭 효과 없앰
</style>
</head>
<body>
<address>서울 강남구</address>
</body>
모바일에서 전화걸기 링크
- <!DOCTYPE html>
- <html>
- <head>
- <meta charset="utf-8" />
- <title>모바일웹에서 전화걸기 링크 만들기</title>
- </head>
- <body>
- <a href='tel:010-0000-0000'>전화하기</a>
- </body>
- </html>
footer 태그:회사의 정책,주소,전화번호,저작권 표시 마크,고객센터정보,사이트맵
<!DOCTYPE html>
<html>
<head>
<meta charset="utf-8" />
<title>footer 태그</title>
</head>
<body>
<footer>
<div id="serviceNameArea">
<a href="/">
<h2>sycoding</h2>
</a>
</div>
<ul>
<li>회사소개</li>
<li>개인정보보호정책</li>
<li>위치</li>
<li><a href='tel:010-XXXX-XXXX'>고객센터</a></li>
</ul>
<address>주소:강남구</address>
</footer>
</body>
</html>
nav태그:메뉴 표시
- <!DOCTYPE html>
- <html>
- <head>
- <meta charset="utf-8" />
- <title>nav 태그</title>
- </head>
- <body>
- <nav>
- <ul>
- <li>HTML</li>
- <li>CSS</li>
- <li>JavaScrpt</li>
- <li>jQuery</li>
- <li>MySQL</li>
- <li>PHP</li>
- </ul>
- </nav>
- </body>
- </html>
section태그 :서브제목과 해당 제목에 대한 내용을 작성하는 구조
- <section>
- <h1>제목</h1>
- <p>내용</p>
- </section>
article태그 신문기사,블로그의 글 등 작성할 때사용
- <article>
- <h1>제목</h1>
- <p>내용</p>
- </article>
article vs sectionarticle 독립적인 글 작성section 서로 연관있는 내용 작성
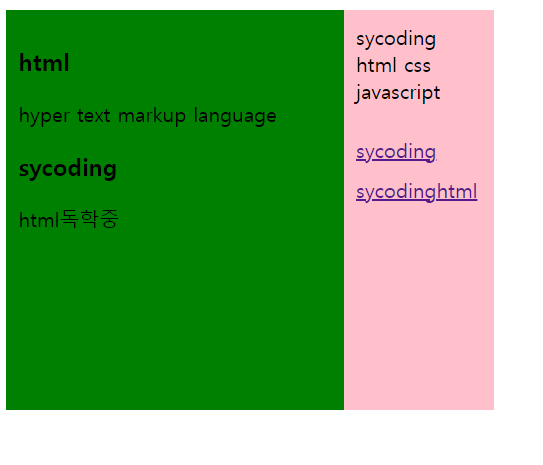
aside 태그+css
<!DOCTYPE html>
<html>
<head>
<meta charset="utf-8" />
<title>aside 태그</title>
<style>
section,aside{float:left;height:300px;padding:10px}
section{width:250px;background:green}
aside{width:100px;background:pink}
aside ul{list-style:none;padding:0}
aside ul li{clear:both;float:left;margin-top:10px}
</style>
</head>
<body>
<section>
<article>
<h1>html</h1>
<p>hyper text markup language</p>
</article>
<article>
<h1>sycoding</h1>
<p>html독학중</p>
</article>
</section>
<aside>
sycoding<br>
html css javascript <br>
<ul>
<li><a href='https://syscoding.tistory.com/' target='_blank'>sycoding</a></li>
<li><a href='https://syscoding.tistory.com/' target='_blank'>sycodinghtml</a></li>
</aside>
</body>
</html>
video태그 :웹페이지에 영상파일 재생할때 사용
- <video src='동영상의 주소'>
- 웹브라우저가 video태그를 지원하지 않을 때 표시할 문구
- </video>
vidio태그에 사용하는 속성
- src : 비디오 파일의 주소
- controls : 컨트롤러 표시
- autoplay : 자동 재생
- loop : 반복 재생
- width : 영상의 가로길이
- height : 영상의 세로길이
- muted : 음소거
audio태그:웹페이지에 음성파일을 재생할때 사용
- <audio src='음성파일의 주소'>
- 웹브라우저가 audio태그를 지원하지 않을 때 표시할 문구
- </audio>
audio태그에 사용하는 속성
- src : 오디오 파일의 주소
- controls : 컨트롤러 표시
- autoplay : 자동 재생
- loop : 반복 재생
- width : 가로길이
- height : 세로길이
- muted : 음소거
base태그:url이 들어가는 태그의 주소를 지정하는 역할
head안에서 사용
주소를 지정하면 url이 들어가는 태그에는 주소를 작성하지 않고 파일명만 입력하므로 편하게 사용
- <base href="주소" />
web/htmlstudy폴더안에 있는 star.jpg파일을 열어본다면
- <head>
- <meta charset="utf-8" />
- <title>base 태그 학습</title>
- <base href="/web/htmlstudy/" />
- </head>
- <body>
- <img src="star.jpg" />
- </body>
bdi태그:텍스트의 방향을 반대로 변경할때 사용
- <!DOCTYPE html>
- <html>
- <head>
- <meta charset="utf-8" />
- <title>bdi 태그 학습</title>
- </head>
- <body>
- <p>Hello World</p>
- <p>안녕하세요.</p>
- <p>こんにちは。</p>
- <p><bdi>سلام.</bdi></p> //아랍어는 오른쪽에서 왼쪽
- </body>
- </html>
caption태그:테이블의 설명문을 추가할 때 사용
- <caption>설명</caption>
하나의 table태그에 하나의 caption태그 사용
cite태그 : 영화,음악,책,작품 등 이름을 표시할때 사용
ins태그 : del 태그로 삭제를 하고 추가된 내용을 작성
details태그: 어떠한 요소에 대해 더 자세한 설명을 추가할때 사용
<!DOCTYPE html>
<html>
<head>
<meta charset="utf-8" />
<title>details 태그 학습</title>
</head>
<body>
<details>
<ul>
<li>말티즈</li>
<li>리트리버</li>
<li>푸들</li>
</ul>
</details>
</body>
</html>
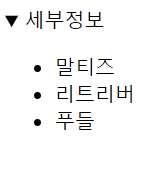
+<summary>내가 좋아하는 강아지</summary>

fieldset 태그 :form태그에서 비슷한 항목들을 구분할때 사용
figure 태그
figcaption 태그: 웹 문서에서 이미지,삽화,동영상등의 설명을 추가할때 사용
figure 태그 내에서 사용
- <figure>
- <img src="/material/images/HTML/pico-152.png" />
- <figcaption>이미지 설명</figcaption>
- </figure>
<!DOCTYPE html>
<html>
<head>
<meta charset="utf-8" />
<title>figure 태그 학습</title>
</head>
<body>
<figure>
<img src="star.jpg" width="100px" height="100px" />
<figcaption>별</figcation>
</figure>
</body>
</html>
